How to Program Your LiftMaster Garage Door Remote: A Step-by-Step Guide: Moving into a new home or just replaced your remote? Don’t make the mistake of leaving old codes active. In this Mr. Locksmith™ guide, Terry walks you through the definitive process for programming LiftMaster, Chamberlain, and Craftsman garage door remotes—a system that has remained remarkably consistent from 1993 to the present day.
Most people skip the most important step: The Security Wipe. We’ll show you how to erase every previous remote and keypad from your opener’s memory before pairing your new device. Whether you’re a homeowner looking for a quick fix or a technician wanting to sharpen your field skills, this step-by-step breakdown ensures your garage isn’t just convenient—it’s secure. (Source: Terry Whin-Yates)
Source: Mr. Locksmith Youtube http://www.youtube.com/user/24hrMrLocksmith
How to Program Your LiftMaster Garage Door Remote
Easy LiftMaster Garage Door Remote Programming Guide
Mr. Locksmith Automotive (604) 259-7617
Moving into a new home or simply replacing an old remote? Programming a garage door opener is one of those essential tasks that can feel intimidating if you don’t know the “secret handshake” of the machine.
In this guide, I’ll walk you through the professional way to program a LiftMaster garage door remote. The best part? LiftMaster has kept their system remarkably consistent—the same remote technology has been used from 1993 to the present [00:05]. This process also works for most Chamberlain and Craftsman garage door openers [00:13].

Step 1: Security First – Erase Old Remotes
The most important step that almost everyone forgets is security. When you move into a new place, you have no idea how many old remotes or keypads are still programmed into your opener [00:43].
Before you add your new remote, wipe the slate clean:
Locate the Learn Button on your garage door opener motor unit.
Press and hold the button for about 6 seconds [01:05].
The indicator light will turn on and then go out. Once that light goes out, every old remote, keypad, and previous setting has been wiped [01:13]. Your garage is now secure.
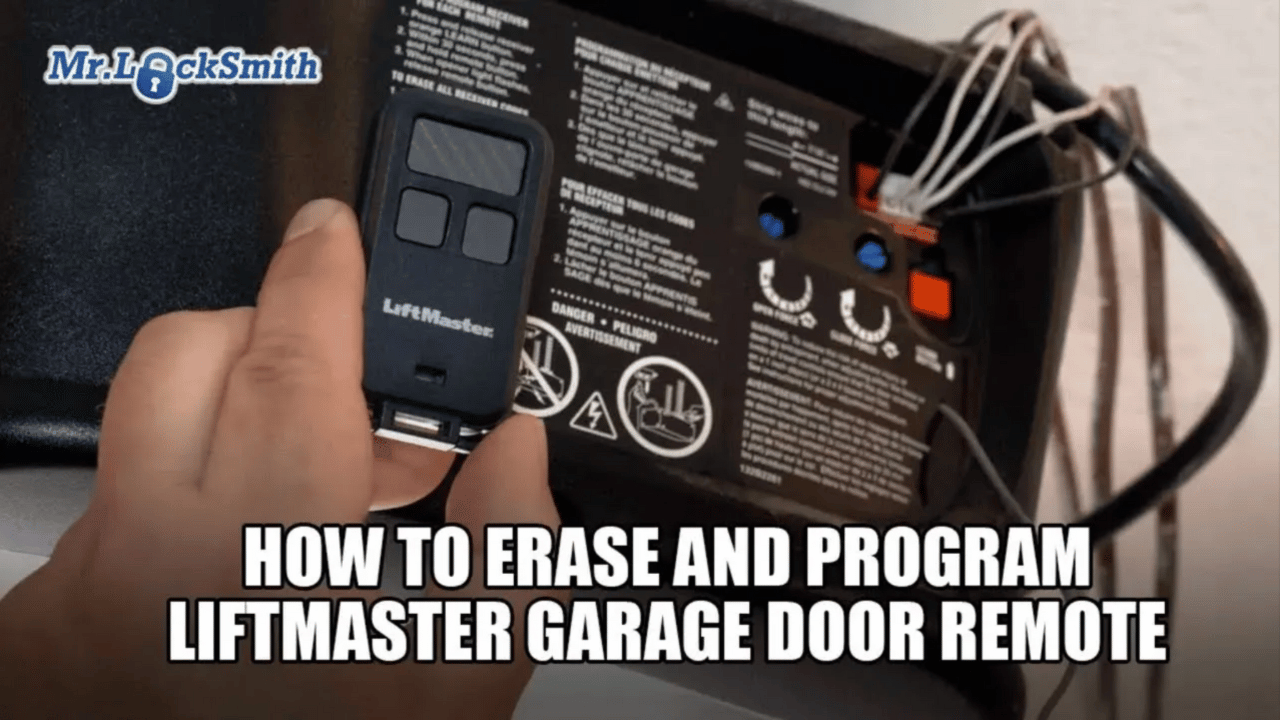
Step 2: Put the Remote into Programming Mode
Now that the opener is cleared, you need to tell your remote it’s time to learn a new code.
On your remote fob, locate the small programming button (usually accessed via a pinhole or on the side).
Press it until the red light on the remote stays on [01:27]. It is now in programming mode.
Step 3: Pair the Remote to the Opener
Go back to the garage door opener motor and press the Learn Button once (the light on the motor will turn on) [01:33].
On your remote, choose the button you want to use to open the door.
Press that button three times [01:38].
To finish and “lock in” the programming, press any other button on the remote [01:51].
Step 4: The Final Test
Give it a click! If you followed these steps correctly, your door should now operate perfectly [02:02].
Pro Tip from Mr. Locksmith
Garage door maintenance is often overlooked. If you’re having trouble with the door itself—not just the remote—stay tuned, as I’ll be releasing more videos on how to troubleshoot and fix common garage door mechanical problems. Source: Terry Whin-Yates Mr. Locksmith Linkedin
Master the Trade
Want to learn more about residential security or professional locksmithing? Visit Mr. Locksmith Training for online courses ranging from beginner basics to advanced non-destructive entry techniques.
Don’t forget to subscribe to the Mr. Locksmith YouTube channel for more professional tips and tool reviews!
Explore Online Training Here
ONLINE AUTOMOTIVE LOCKSMITH COURSE & WEBINAR
✅ Sign up here: https://mr-locksmith-training.thinkific.com/courses/automotive-locksmith-training
For Updated Locksmith Workshop Training Dates and Location go to https://mrlocksmith.com/locksmith-workshop-training-dates/
✅ Sign up here: https://mr-locksmith-training.thinkific.com/courses/locksmith-course-Become-a-Locksmith
Source: Terry Whin-Yates Mr. Locksmith Linkedin